
Painting Kitchen Cabinets: Step-by-Step Guide
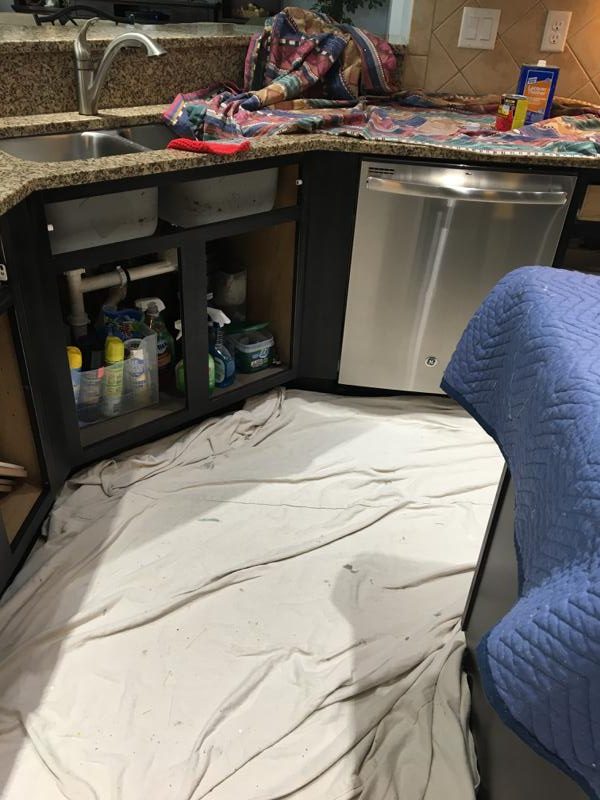
Are you tired of looking at your outdated kitchen cabinets? Repainting them with fresh paint can give your kitchen a brand new look without breaking the bank. But before you start this painting project, it’s important to prepare your old cabinets properly by removing any old paint or finishes.
Latex paint is a popular choice for repainting old cabinets, and Benjamin Moore offers a wide range of colors and finishes to choose from. However, not all paints are created equal, so it’s crucial to read the label carefully to ensure that the paint you select is suitable for cabinets and will adhere properly to the surface.
In this article, we’ll discuss everything you need to know about repainting old cabinets with latex paint. From preparing the surface and selecting the right color to applying the paint correctly, we’ve got you covered. So let’s dive in!
Can You Just Paint Over Old Cabinets?
Many of our clients wonder if I can just paint over old cabinets? If you’re looking to give your kitchen a fresh new look without breaking the bank, painting over old cabinets can be an excellent option. However, it’s important to keep in mind that simply slapping on a coat of paint won’t do the trick. Proper preparation is key to achieving a long-lasting and professional-looking finish.
Cleaning Your Cabinets
Before you start painting, you need to make sure your cabinets are clean and free of any dirt or grease that may have accumulated over time. Use a degreaser or a mixture of warm water and dish soap to wipe down all surfaces thoroughly. Rinse with clean water and let dry completely before moving on to the next step.
Sanding Your Cabinets
Sanding your cabinets is crucial for creating a rough surface that will allow the paint to adhere properly. Use 120-grit sandpaper to sand all surfaces lightly, making sure to remove any glossy finish or varnish. Don’t forget to sand inside corners and crevices as well.
After sanding, wipe down all surfaces with a tack cloth or a damp rag to remove any dust particles.
Applying Primer
Applying primer is an essential step in painting over old cabinets as it helps the paint stick better and last longer. Choose a high-quality primer that’s suitable for your cabinet material (wood, laminate, etc.) and apply it evenly using a brush or roller. Let dry completely before moving on to the next step.
Painting Your Cabinets
opt for high-quality products that are specifically designed for kitchen use as they’re more durable and resistant to moisture and stains.
Using a brush or roller, apply two coats of paint evenly, making sure not to leave any drips or streaks. Let each coat dry completely before applying the next one.
Allowing Time To Dry
Once you’ve finished painting, it’s important to let your cabinets dry completely before using them again. Depending on the type of paint you’ve used and the humidity level in your area, drying time can take anywhere from a few hours to a few days.
Avoid touching or using your cabinets until they’re fully dry to prevent any smudging or damage.
Frequently Asked Questions
- Can I just paint over my cabinets?
Yes, you can paint over old cabinets as long as you prepare them properly and use high-quality products.
- Can I just paint over kitchen cabinets?
Yes, kitchen cabinets can be painted over as long as they’re cleaned thoroughly and sanded properly beforehand.
- Can I just paint over old paint?
You should sand old paint off before repainting to ensure proper adhesion of the new coat of paint.
- Why did we repaint our cabinets?
Repainting your cabinets can give your kitchen a fresh new look without having to replace them entirely. It’s also a cost-effective way to update your space and increase its value.
Types of Paint to Use for Kitchen Cabinets
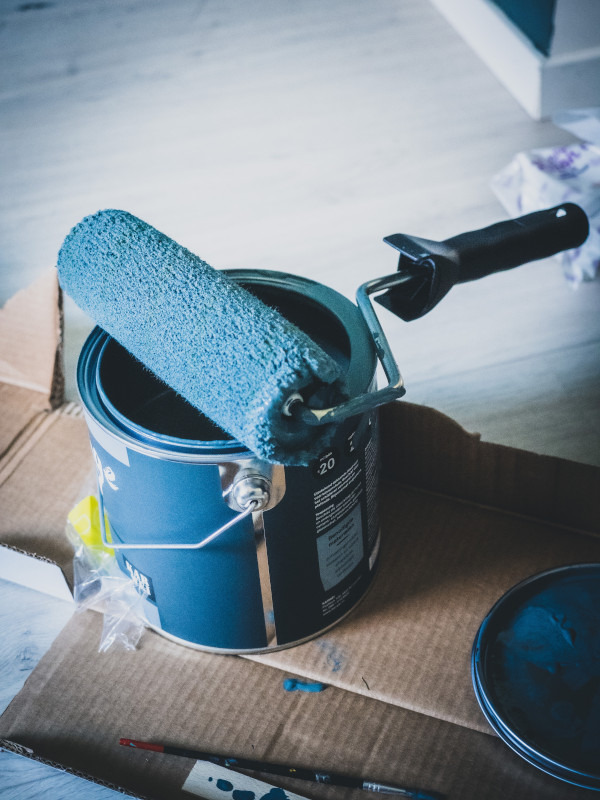 Choosing the right type of paint is crucial. The quality and durability of the paint will determine how long your cabinets will last and how well they will hold up against wear and tear. In this article, we’ll discuss the different types of paint you can use for kitchen cabinets and their pros and cons.
High-Quality Paint is Essential for Kitchen Cabinets
First things first, it’s important to invest in high-quality paint when painting your kitchen cabinets. Don’t skimp on price as cheaper paints may not provide the same level of durability and longevity as higher-end options. Look for paints specifically designed for cabinets or trim as they are formulated to withstand frequent use, moisture, and stains.
Oil-Based Paints
Oil-based paints have been a popular choice for kitchen cabinets for many years due to their durability and resistance to moisture and stains. They also tend to dry harder than water-based paints, making them less prone to scratches or dents. However, oil-based paints do have some downsides. They take longer to dry than water-based paints, have a strong odor that requires proper ventilation during application, and require mineral spirits or turpentine for cleanup.
Water-Based Paints
Water-based paints are becoming increasingly popular due to their low odor, quick drying time, easy cleanup with soap and water, and environmental friendliness (they contain fewer VOCs than oil-based paints). They also tend to resist yellowing over time better than oil-based paints. However, they may not be as durable as oil-based options.
Semi-Gloss or High-Gloss Finish Provides Better Protection
Regardless of whether you choose an oil-based or water-based paint, it’s important to select a finish that provides adequate protection against wear and tear. A semi-gloss or high-gloss finish is ideal for kitchen cabinets as it provides a hard, durable surface that can withstand frequent use and cleaning. These finishes are also easier to clean than flat or satin finishes, which tend to show fingerprints and smudges more easily.
Prepping the Space for Cabinet Painting
prepping the space is crucial. Follow these steps to ensure a successful cabinet painting project.
Clearing and Cleaning the Space
The first step in prepping your space for cabinet painting is clearing out all items from the kitchen cabinets. This will create a clear workspace and prevent any items from getting in the way during the painting process.
Once you have cleared out your cabinets, clean them thoroughly to remove any dirt or grease buildup that may prevent the paint from adhering properly. Use a degreaser or soap and water solution to get rid of any grime on your cabinets. Make sure to dry them completely before moving on to the next step.
Sanding Down Bare Wood Spots
If you have any rough or bare wood spots on your cabinets, sand them down with fine-grit sandpaper until they are smooth. This will create a surface that is ready for paint application. Be sure to wear protective gear such as gloves, goggles, and a mask while sanding down your cabinets.
After sanding down your cabinets, use a tack cloth to wipe down all surfaces and remove any remaining dust or debris before applying paint color.
Setting Up Your Painting Station
Before starting your cabinet painting process, set up an area where you can work comfortably without interruption. Cover surrounding areas with drop cloths or plastic sheets to protect them from paint splatters.
Make sure you have all necessary tools within reach including brushes, rollers, trays, tape, and other supplies needed for cabinet painting.
Applying Paint Color
Choose a high-quality paint such as SW Emerald for best results when painting kitchen cabinets. Apply two coats of paint using either a brush or roller depending on personal preference.
Allow each coat of paint to dry completely before applying another one. This will ensure that each layer of paint dries evenly and prevents any clumping or bubbling.
Final Touches
Once you have applied your final coat of paint, allow it to dry completely before reattaching any hardware or placing items back in your cabinets. This will prevent any smudging or damage to the finish.
Repairing Damaged Parts and Rehang Doors and Drawers
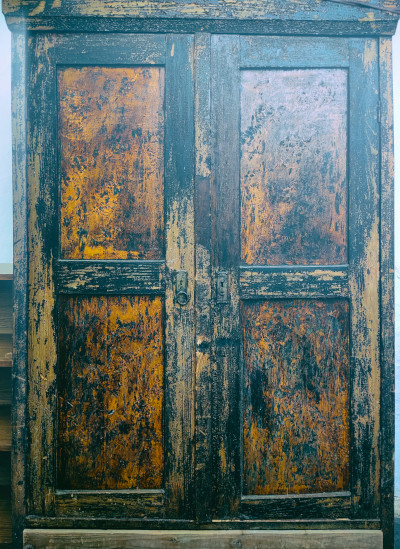 Repairing any damaged parts before starting the project is crucial. This will help ensure that your newly painted cabinets look great and function properly. Here are some tips on how to repair damaged parts and rehang doors and drawers:
Check for Any Damaged Parts
Before you start painting, inspect your cabinet doors, drawers, drawer fronts, and panels for any signs of wear or damage. Look for cracks, holes, or other damage that could affect the durability of your cabinets.
If you find any damaged parts, don’t worry! You can easily fix them with a little bit of wood filler and screws. Simply fill in any cracks or holes with wood filler and let it dry completely. Then use screws to secure any loose pieces in place.
Rehang Doors and Drawers Properly
Properly hanging your cabinet doors and drawers is essential for smooth functioning. If they are not hung correctly, they may rub against each other or not close properly.
To hang your doors correctly, make sure that all hinges are securely attached to both the door and the cabinet frame. Adjust the hinges as needed so that the door hangs straight and flush with the frame.
For drawers, check that they slide smoothly on their tracks without sticking or wobbling. If necessary, adjust the drawer slides or replace them if they are worn out.
Replace Worn or Damaged Hardware
Replacing worn or damaged hardware such as hinges or drawer slides can greatly improve the functionality of your cabinets. Old hardware may be loose or broken which can cause problems when opening/closing doors/drawers.
Make sure to choose hardware that fits well with your cabinets’ style while also being durable enough to withstand daily use. There are plenty of options available at home improvement stores if you need help finding a product that suits your needs.
Removing Doors and Hardware Before Painting
If you’re wondering whether you can just paint over old cabinets, the answer is yes, but there are some important steps to take before diving into the project. One of those steps is removing doors and hardware before painting. This may seem like an unnecessary hassle, but it’s actually a crucial step in achieving a smooth and professional-looking finish.
Why Remove Doors and Hardware?
Firstly, removing doors and hardware allows for better access to all areas of the cabinet, including corners and edges. When you leave the doors on while painting, it can be difficult to get into these tight spaces without accidentally getting paint on other parts of the cabinet or leaving brush marks.
Secondly, by removing the doors, you can paint both sides of them separately. This ensures that each side gets an even coat of paint without any drips or smudges caused by trying to reach around to the backside while it’s still attached.
Another reason for taking off hardware is that it prevents paint from getting on it. If you leave handles or knobs on while painting, they’re likely to get covered in paint as well. Removing them beforehand saves time and effort in trying to clean them later.
How To Remove Doors And Hardware
Before removing anything, label each door and its corresponding hardware so that you know where everything goes when it’s time to put everything back together. You can use masking tape or labels with numbers or letters written on them.
To remove doors:
- Open each door fully.
- Locate the hinges where they attach to both the cabinet frame and door.
- Unscrew each hinge from either side using a screwdriver.
- Carefully lift each door off its hinges.
- Place each door in a safe spot where they won’t be damaged during painting.
To remove hardware:
- Use a screwdriver or drill with a suitable bit size for your screws.
- Unscrew each handle or knob from the cabinet door.
- Place them in a labeled container or bag.
Cleaning the Cabinets Before Painting
If you’re thinking of giving your old cabinets a fresh new look by painting them, it’s important to clean them thoroughly before starting. This will help ensure that the paint adheres well and lasts longer. Here are some tips on how to clean your cabinets before painting.
Remove all items from the shelves before cleaning.
Before you start cleaning your cabinets, make sure to remove all items from the shelves. This will allow you to clean every nook and cranny without any obstructions in the way. You don’t want to accidentally leave any dirt or debris behind because you couldn’t reach a certain spot.
Use a mild detergent and warm water to clean the cabinets thoroughly.
To clean your cabinets, use a mild detergent mixed with warm water. Make sure not to use anything too harsh or abrasive that could damage the surface of your cabinets. A gentle dish soap should do the trick. Dip a sponge or cloth into the soapy water and wipe down all surfaces of your cabinets, including inside drawers and on shelves.
Wipe down the shelves with a damp cloth to remove any dust or debris.
After washing with soap and water, it’s important to wipe down all surfaces with a damp cloth to remove any remaining dust or debris. This will ensure that there is nothing left on the surface that could interfere with paint adhesion later on.
Allow the cabinets and shelves to dry completely before painting.
Once you’ve finished cleaning your cabinets, make sure they are completely dry before moving onto painting them. Any moisture left on the surface can cause problems with paint adhesion and cause bubbles or peeling later on. Letting them air dry for several hours should be sufficient.
Sand any rough areas on the cabinets or shelves before cleaning to ensure a smooth surface for painting.
If there are any rough spots on your cabinet surfaces, it’s important to sand them down before cleaning for optimal paint adhesion. Use a fine-grit sandpaper to smooth out any rough areas and create an even surface for painting.
Avoid using harsh chemicals or abrasive cleaners that could damage the cabinets or shelves.
While it’s important to clean your cabinets thoroughly before painting, it’s equally important to avoid using anything too harsh that could damage the surface. Avoid using bleach, ammonia, or other strong chemicals that can strip away the finish and cause discoloration or warping.
Sanding Surfaces Before Painting
Sanding is an essential step before painting your old cabinets to ensure a smooth surface. Without sanding, the paint may not adhere properly, and the finish may look uneven. In this section, we’ll discuss why sanding is important and how you can do it correctly.
Why Sanding is Important
Sanding creates a rough surface for the paint to grip onto. If you apply paint directly on top of a glossy or smooth surface, it will likely peel off or chip easily. Sanding helps to remove any existing finish or coating on the cabinet’s surface so that the new coat of paint can stick better.
How to Sand Cabinets
Before sanding your cabinets, make sure they are clean and dry. Use fine-grit sandpaper (around 220 grit) to avoid damaging the surface of the wood. You can use an orbital sander or sand by hand with a sanding block.
If your cabinets have laminate surfaces, you may need to do extra sanding to allow the paint to adhere correctly. Lightly scuff up the laminate with fine-grit sandpaper before applying primer or paint.
When lightly scuffing up surfaces with sandpaper, be careful not to overdo it as it will create scratches on your cabinet’s surface that could be visible after painting.
Afterward, use a foam roller or cloth to wipe away any remaining dust or debris from the sanded surfaces before painting.
Applying Primer-Sealer and Paint for Kitchen Cabinets
If you’re wondering whether you can just paint over old cabinets, the answer is yes, but only if you do it right. Applying a primer-sealer is crucial to ensure that the paint adheres well to the cabinets. Skipping this step can lead to peeling and chipping of the paint over time. In this section, we’ll discuss how to apply primer-sealer and paint for kitchen cabinets.
Choosing a Primer-Sealer
Sherwin Williams offers a range of high-quality primers that work well for kitchen cabinets. The most popular options are ProBlock Oil-Based Primer and Multi-Purpose Latex Primer. Both of these products provide excellent adhesion and stain-blocking properties.
Applying the Primer-Sealer
To apply the primer-sealer, start by cleaning your cabinets thoroughly with soap and water. Once they’re dry, use a fine-grit sandpaper to roughen up the surface slightly. This will help the primer adhere better.
Next, apply a thin coat of primer-sealer using a brush or roller. Be sure to cover all surfaces evenly, including any crevices or corners. Allow the first coat to dry completely before applying a second coat.
Applying a second coat of primer is important because it ensures complete coverage and provides a smooth finish. Don’t rush this step – let each coat dry fully before moving on to the next one.
Choosing Paint
there are many options available on the market today. However, not all paints are created equal – some may not hold up as well in high-traffic areas like kitchens.
For best results, choose a high-quality acrylic latex paint that’s specifically designed for cabinetry or trim work. These types of paints are more durable than standard wall paints and will hold up better over time.
Applying Paint
Once the primer has dried completely, it’s time to apply the paint. Use a clean brush or roller to apply thin, even coats of paint. Don’t overload your brush or roller – this can lead to drips and an uneven finish.
As with the primer-sealer, it’s important to let each coat of paint dry fully before applying the next one. Depending on the type of paint you’re using, you may need to apply two or three coats for complete coverage.
Painting Hard-to-Reach Areas with a Brush
Painting cabinets can be a daunting task, especially. However, with the right tools and techniques, you can achieve a professional-looking finish without having to hire a painter. In this section, we will discuss how to paint hard-to-reach areas using a brush.
Use a high-quality brush to ensure even application of paint in hard-to-reach areas.
investing in a high-quality brush is essential. A good brush will allow for even application of paint and prevent unsightly brush marks. Look for brushes with long, flexible bristles that can reach into tight spaces and corners.
Lightly sand the area to be painted and remove any dust or stain before starting the job.
Before painting your cabinets, it’s important to prepare the surface properly. Lightly sand the area you plan to paint to create a smooth surface for the paint to adhere to. Be sure to remove any dust or stain from the surface before starting the job as these can affect the quality of your finished product.
Apply painter’s tape to trim and other areas that should not be painted, and use a brush with long, flexible bristles to avoid brush marks.
Painter’s tape is an essential tool. Use it to protect trim and other areas that should not be painted. When applying paint in hard-to-reach areas, use a brush with long, flexible bristles that will allow you to reach into tight spaces without leaving unsightly brush marks.
When using oil paint, clean the brush with mineral spirits while latex paint can be cleaned with water. Apply a gloss finish to add durability to the painted area.
Cleaning your brushes properly after each use is important if you want them to last. When using oil-based paints, clean your brushes with mineral spirits. For latex-based paints, water is sufficient. Applying a gloss finish to your painted cabinets can add durability and protect the surface from wear and tear.
Tips for Repainting Kitchen Cabinets
Are you tired of looking at your outdated kitchen cabinets? Instead of spending thousands of dollars on brand new ones, consider giving them a fresh coat of paint. Painting your kitchen cabinets is a cost-effective way to update the look of your kitchen without breaking the bank. Here are some tips to help you get started:
Clean the Cabinets Thoroughly Before Painting
Before you start painting, it’s important to clean your cabinets thoroughly. Use a degreaser to remove any built-up grime and grease from cooking. Wipe down the cabinets with a damp cloth and let them dry completely before moving on to the next step.
Sand the Cabinets to Create a Smooth Surface for the Paint to Adhere To
Sanding your cabinets is an essential step in preparing them for paint. This will create a smooth surface for the paint to adhere to and ensure that it lasts longer. Use fine-grit sandpaper (220 grit) and sand in the direction of the wood grain until all glossy surfaces have been dulled.
Use a Primer Before Painting
Using a primer before painting will help ensure better coverage and adhesion. It also helps seal any stains or discolorations on the wood, preventing them from bleeding through into your final coat of paint. Apply one coat of primer using a brush or roller, making sure not to leave any drips or excess primer behind.
Consider Using a Paint Sprayer for a Smoother Finish
While you can use brushes or rollers to apply paint, using a paint sprayer can give you an even smoother finish. This method allows for more control over how much paint is applied and reduces streaks or brush marks that may be left behind by traditional methods.
Allow Sufficient Drying Time Between Coats of Paint
It’s important to allow sufficient drying time between coats of paint. This ensures that each layer dries properly before adding another. Follow the manufacturer’s instructions for drying times, and make sure your workspace is well-ventilated to help speed up the process.
Now that you have some tips on how to repaint your kitchen cabinets, let’s answer some common questions:
How Hard Is It to Paint Kitchen Cabinets?
Painting kitchen cabinets can be a time-consuming project but it’s not necessarily difficult. With the right tools and materials, anyone can do it. Just be prepared to spend a few days to weeks working on this project, especially if you’re doing it alone.
Why Should I Consider Painting My Kitchen Cabinets?
Painting your kitchen cabinets is a great way to update the look of your kitchen without spending a lot of money. It’s also an eco-friendly option since you’re repurposing existing materials instead of throwing them away. And if you decide to sell your home in the future, updated cabinets can increase its value.
How Do I Choose the Right Paint Color?
Choosing the right paint color for your kitchen cabinets can be overwhelming. Start by considering the overall style and color scheme of your kitchen. Do you want something bold or neutral? Light or dark? Once you have an idea of what you’re looking for, test out different colors in small areas before committing to one specific shade.
Conclusion: Can You Just Paint Over Old Cabinets?
Yes, you can definitely paint over old cabinets to give them a fresh new look. However, it’s important to follow the proper steps and use the right materials for the best results.
Firstly, consider using high-quality paints specifically designed for kitchen cabinets. This will ensure durability and longevity of your newly painted cabinets.
Before painting, make sure to prep the space properly by repairing any damaged parts and rehanging doors and drawers. Remove all hardware before painting as well.
Cleaning and sanding the surfaces is also crucial for a smooth finish. Applying primer-sealer before painting will help the paint adhere better and prevent any bleed-through from stains or knots in the wood.
When applying paint, use a brush for hard-to-reach areas and follow proper techniques to avoid drips or uneven coverage.
Lastly, keep in mind some tips such as avoiding rushing through the process, allowing ample drying time between coats, and considering hiring a professional if you’re unsure about tackling this project yourself.
Overall, repainting your old kitchen cabinets can be a cost-effective way to update your space without breaking the bank. Give it a try with these tips in mind!
If all of this feels a little overwhelming, feel free to call us at (904) 729-5059 for all your Jacksonville Cabinet Painting needs.